Non-contact inspection systems are a cornerstone of production line quality control, and +Vantage prides ourselves on bringing professional grade metrology to your shop floor. Inspection systems may be broadly categorized by whether or not they require contact with a part to take their measurement, hence, contact and non-contact systems. Non-contact is oftentimes more versatile and can take advantage of cameras, lasers and intelligent vision systems to ensure you stay within tolerance, and the ability to analyze and inspect parts from a distance allows for easier integration into your production process; empowering an inline, automated inspection methodology consistent with industry 4.0.
Types of Non-Contact Inspection Technology
Non-contact inspection technologies generally fall into one of several categories, usually based around their use of either lasers, or cameras in conjunction with intelligent vision systems.
3D Laser Line Profilers
This type of 3D visual inspection technology uses a laser line to generate topographical data of your object of interest, allowing for you to rapidly generate a 3D profile of the object and compare it against a production baseline. Laser line profilers provide the capability for a single sensor to generate height, width and angle measurements. 3D laser line profiling can achieve up to 3200 points per profile for accuracy, and with a maximum laser line width of up to 28”, this technique is not reserved for small parts alone. For exceedingly large parts, laser line sensors can work in tandem to generate a complete image, giving you a technology ready to scale with your business.
3D Structured Lighting

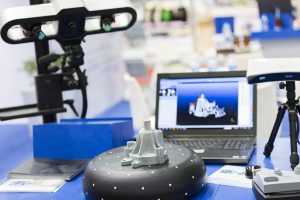
3D structured lighting works by trigonometric triangulation, projecting a pattern of light onto an object. Offset cameras then evaluate the shape of the pattern, using the distortion to generate a fully 3 dimensional image. These sensors are highly well adapted to inline processes, with resolution up to 6.7 microns along the XY plane and 0.2 micron repeatability along the Z axis. Fast scan rates and wide field of view make them ideal for use in conjunction with pick and place machines. This technology is widely applicable for inspecting small parts during moments between manufacturing steps, owing to rapid acquisition time by the sensors.
2D Industrial Vision Systems
2D vision systems operate in a similar manner to 3D structured lighting, but whereas 3D structured systems build a fully three dimensional model of the object and compare it to baseline for variance or defects, 2D vision systems capture snapshots of the part in question. Vision processing algorithms then extract data needed to compare against a baseline, and provide a go/no go decision to the system. Modern 2D vision systems are able to make use of deep learning technology, automating a quality control step once reserved for human inspectors, and increasing throughput on your production line.
Telecentric Lenses for Dimensional Inspection
Vision systems provide remarkable capability for inspection processes, but many ultimately succumb to a pitfall inherent in all visual sensors, including the human eye.Traditional lenses distort objects, causing nearer objects to appear larger while objects further away appear smaller. While this enables us to enjoy the benefits of depth perception, this handicaps visual inspection systems, which requires a static relationship between image dimensions and distance from the camera. Telecentric lenses solve this problem by taking in light which is parallel to the optical axis and normal to the plane of the inspected object. Because only purely perpendicular light is transmitted through the lens, this allows for accurate retention of object dimensions through the lens and into your vision system, providing an immense boon for accuracy of inspection.
The Role of Non-Contact
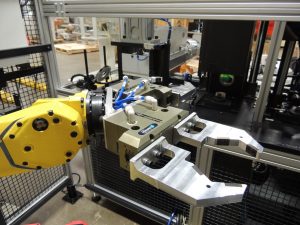
For production lines which move at a high speed, non-contact vision systems are an excellent fit. Owing to their high sampling rate and ability to inspect a part from a distance, 2D and 3D systems work well as inline processes, providing clear go/no go designations and rapid data acquisition for an integrated, intelligent production line
+Vantage Metrology at Work

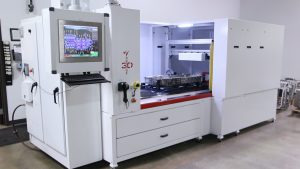
Every system we produce is fully bespoke; designed to meet your application, needs and specification. As an example, here’s an inline, non- contact solution we designed for a casting supplier. This stage is fully in line and able to be loaded either manually or via a pick and place robot integrated into the manufacturing process. Laser line and laser spot triangulation allow you to capture the entire surface with a resolution of up to 3 million data points, and with repeatability and accuracy on the order of 0.03mm, you can rest assured knowing your data is accurate, and only compliant parts are being passed through quality control.
Our Partners in Precision
+Vantage supplies you with the best vision systems in the industry, and we’re proud to work with and integrate systems from the industry leaders in non-contact technology, including but not limited to:
Contact Us
If non-contact inspection systems sound like the right step for your business, please reach out to us, so +Vantage can get to work for you!
